
요즘 SNS를 휩쓸고 있는 ‘스톰’ 챌린지 영상, 다들 한 번쯤 보셨을 거예요. 문제는 저 안무를 실제로 따라 추기는 쉽지 않다는 것! 그런데 AI 영상 툴 하나만 있으면 춤을 전혀 못 춰도 똑같은 동선과 리듬으로 내 캐릭터가 춤추는 영상을 만들 수 있습니다.
오늘은 힉스필드(Higgsfield)의 제인주츠(Genjutsu) – 모션 트랜스퍼(Motion Transfer) 기능으로 이 영상을 만드는 전 과정을 스크린샷과 실제 사용한 프롬프트까지 함께 공개할게요.
(이 글에는 제휴 링크가 포함되어 있으며, 링크를 통해 가입 시 작성자에게 소정의 혜택이 제공될 수 있습니다.)
시작하기 전에 확인할 것
오늘 만들 영상의 원본 레퍼런스
이 영상 속 ‘안무 동선’만 그대로 가져와서, 전혀 다른 캐릭터 이미지에 입히는 게 오늘 튜토리얼의 핵심입니다. 먼저 원본이 된 레퍼런스 영상 아래 버튼을 누르고 들어가셔서 다운로드 받아주세요.
오늘 사용할 툴, 힉스필드
힉스필드는 이미지·영상 생성부터 오늘 다룰 모션 트랜스퍼까지 지원하는 올인원 AI 영상 플랫폼입니다. 아래 링크로 들어가면 별도 가입 절차 없이 바로 다양한 AI 영상 도구를 둘러볼 수 있어요.
STEP 1~3. 힉스필드 Genjutsu 진입하기
STEP 1. 힉스필드 접속하기
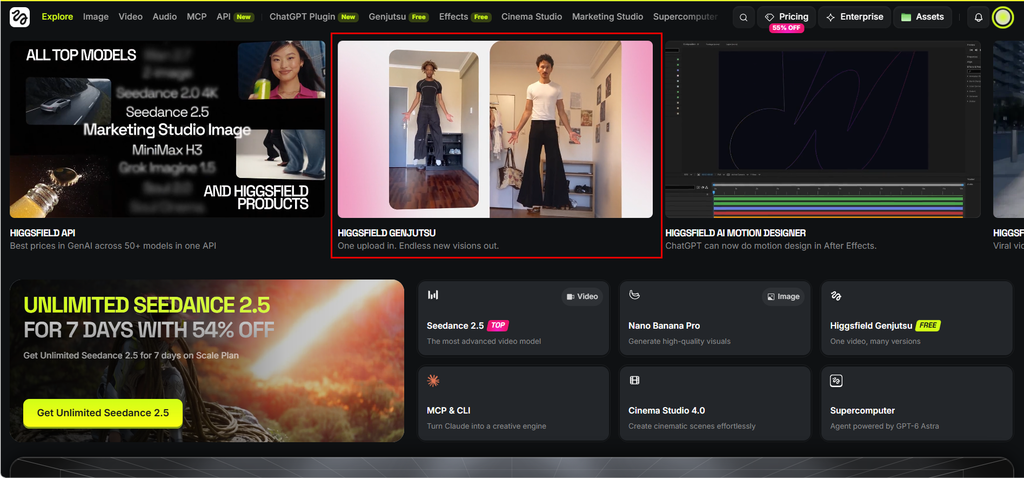
[홈화면에 위 이미지처럼 Higgsfield Genjutsu 보시면 바로 클릭하시면 됩니다. ]
힉스필드 홈페이지에 접속하면 상단 메뉴에서 Explore, Image, Video, Audio 등 다양한 카테고리를 확인할 수 있습니다. 오늘은 이 중 Video 메뉴를 사용할 거예요.
STEP 2. Video 메뉴에서 Genjutsu 선택하기
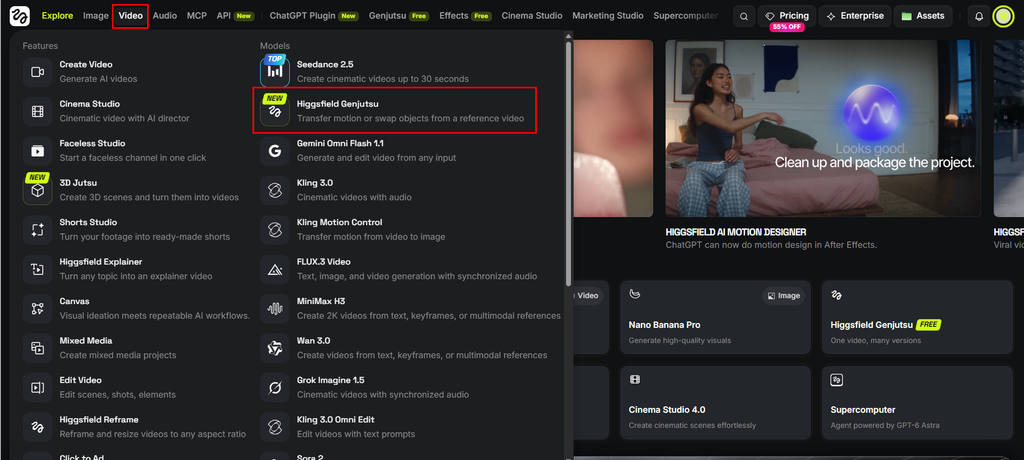
[Video 드롭다운 메뉴, Higgsfield Genjutsu 항목]
상단 Video 탭을 클릭하면 여러 영상 모델이 나열됩니다. 이 중 Higgsfield Genjutsu를 선택하세요. “Transfer motion or swap objects from a reference video”라는 설명처럼, 레퍼런스 영상의 모션(안무)을 그대로 가져오거나 특정 요소만 바꿔치기할 수 있는 기능입니다.
STEP 3. Create Video → Motion Transfer 화면 진입
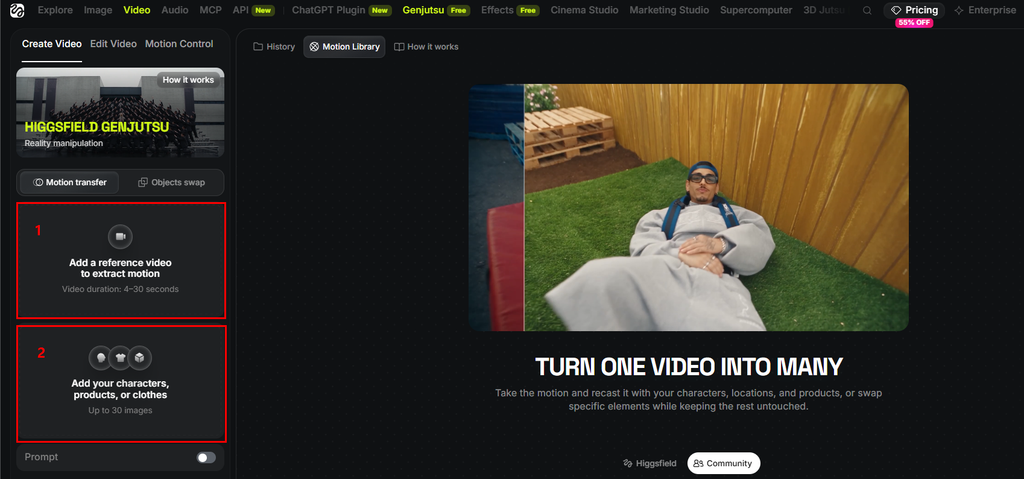
[Genjutsu Create Video / Motion transfer 초기 화면]
- 동영상 업로드
- 이미지 업로드
Genjutsu 안에서 Create Video 탭, 그리고 Motion transfer 옵션이 선택되어 있는지 확인합니다. (참고로 옆에는 특정 오브젝트만 바꾸는 ‘Objects swap’ 옵션도 있어요.) 왼쪽에 “Add a reference video to extract motion” 박스가 보이면 준비 완료입니다.
STEP 4~6. 레퍼런스 영상 업로드 및 편집
STEP 4. 레퍼런스 영상 업로드하기
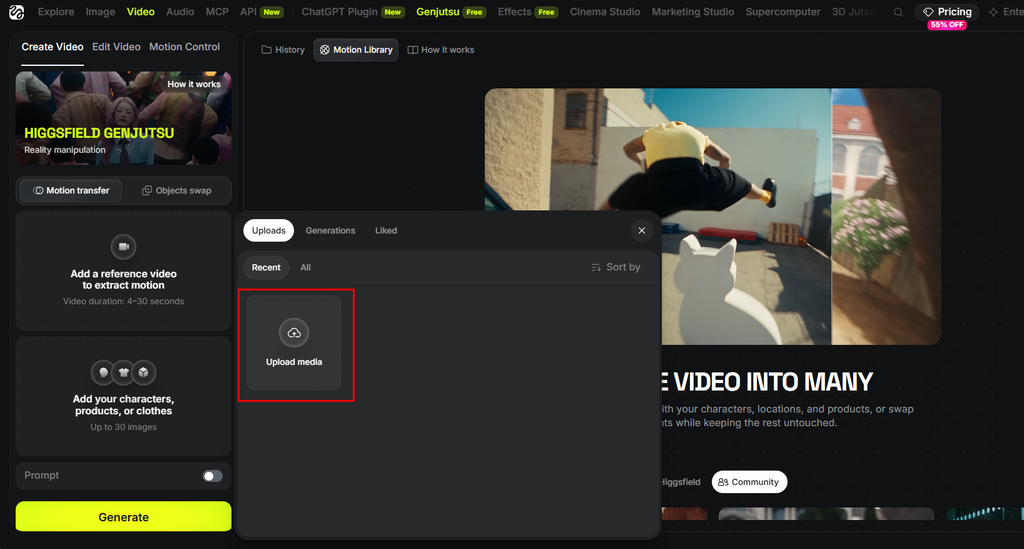
“Add a reference video” 박스를 클릭하면 업로드 창이 뜹니다. 여기에 안무(모션)를 추출하고 싶은 원본 영상, 즉 위에서 공유한 오리지널 비디오를 업로드해주세요. 영상 길이는 4~30초 사이여야 합니다.
STEP 5. 레퍼런스 구간 편집(트리밍)하기
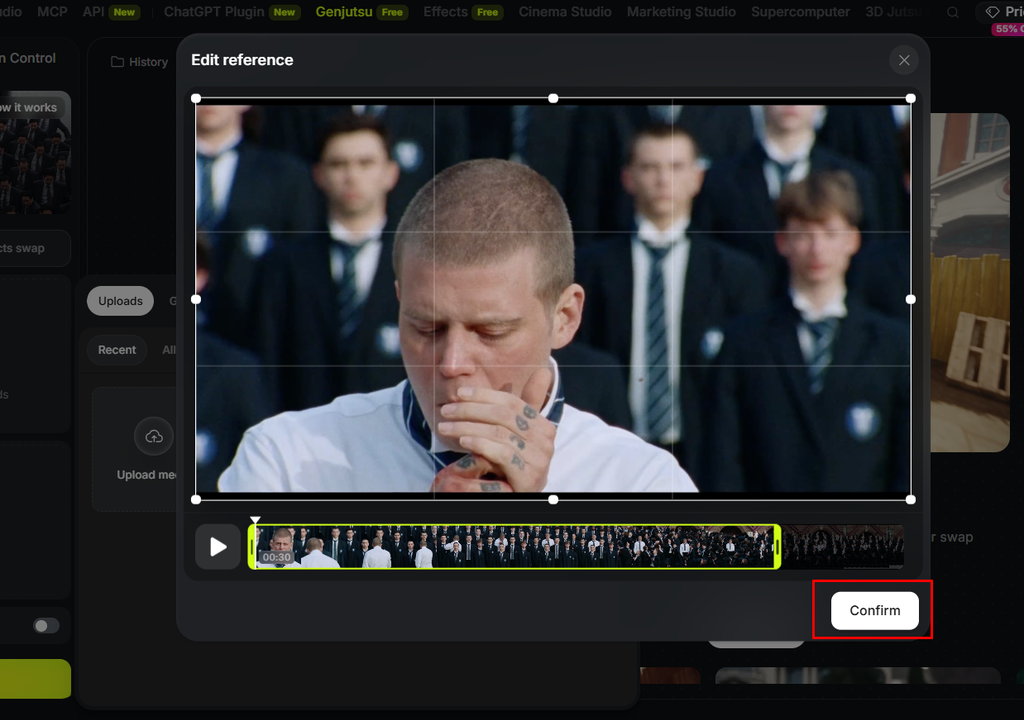
[Edit reference, 타임라인 트리밍 화면]
영상을 업로드하면 “Edit reference” 창이 뜨면서 원하는 구간을 잘라낼 수 있습니다. 하단 타임라인 바를 드래그해서 실제로 사용할 30초 구간을 지정한 뒤 Confirm을 눌러주세요.
STEP 6. 업로드된 레퍼런스 영상 확인
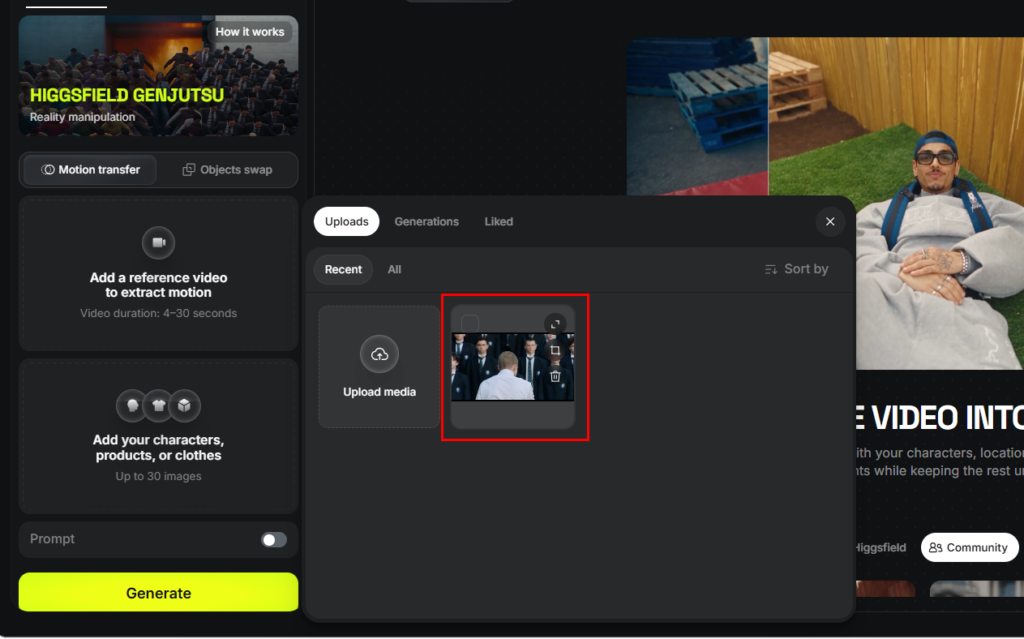
[좌측 패널에 반영된 레퍼런스 영상 썸네일]
Confirm을 누르면 왼쪽 상단 박스에 방금 편집한 레퍼런스 영상이 썸네일로 들어간 걸 확인할 수 있습니다. 이제 이 영상의 ‘움직임’만 다른 캐릭터에게 입힐 준비가 끝났어요.
STEP 7~9. 캐릭터 이미지 업로드 및 역할 지정
STEP 7. 캐릭터 이미지 업로드하기
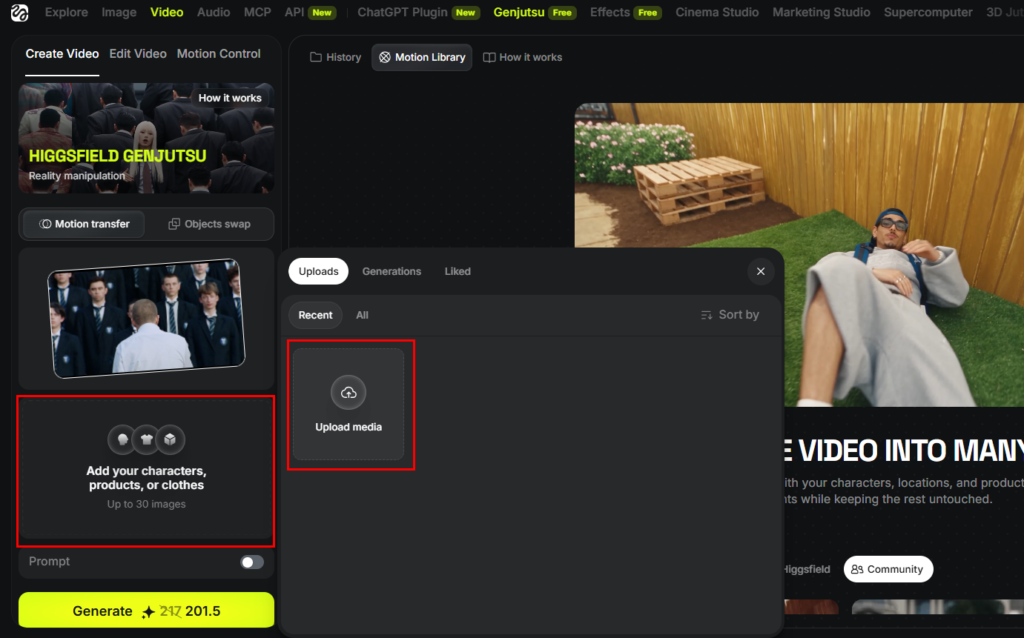
바로 아래 “Add your characters, products, or clothes” 박스를 클릭합니다. 여기에는 최대 30장까지 이미지를 넣을 수 있는데, 오늘은 캐릭터 이미지 2장을 사용합니다.
STEP 8. 캐릭터 이미지 2장 준비하기
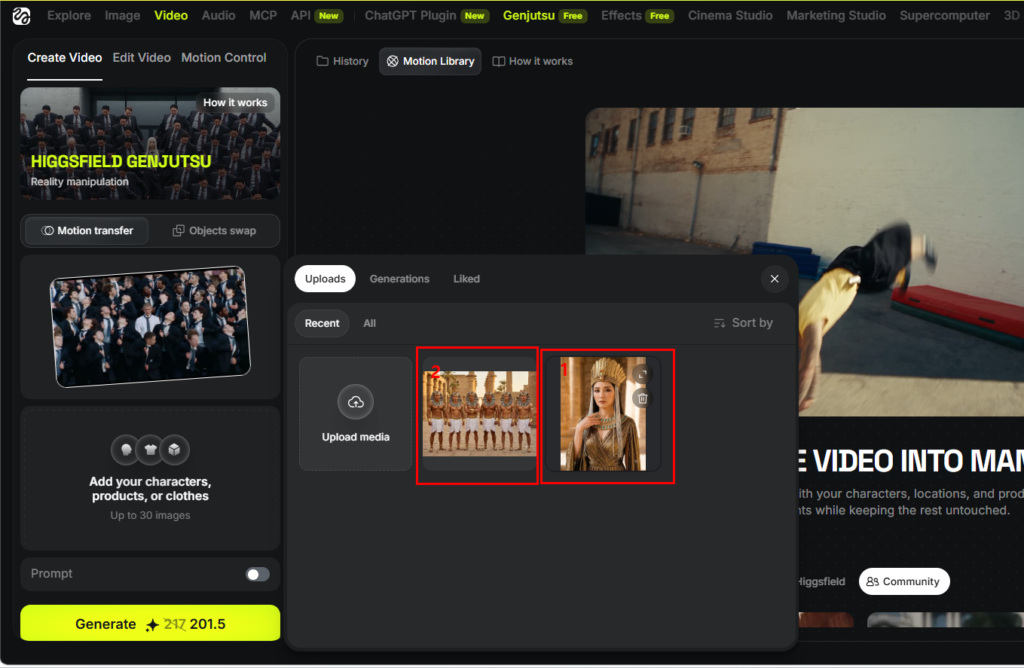
[업로드된 두 개의 캐릭터 이미지]
이미지는 미리 촬영한 사진을 써도 되지만, 원하는 컨셉이 명확하다면 이미지 생성 AI로 아래 두 장을 직접 만들어서 사용하는 걸 추천드려요.
- 이미지 1: 주인공의 상반신 컨셉 이미지 — 얼굴, 헤어, 메이크업, 의상이 잘 보이도록 생성한 클로즈업 컷
- 이미지 2: 주인공 옆에서 함께 춤추는 사람들의 컨셉 이미지 — 백댄서 역할을 할 그룹의 의상과 분위기가 드러나는 컷
이렇게 역할을 나눠서 이미지를 준비(또는 생성)해두면 AI가 ‘누가 메인이고 누가 서브인지’ 훨씬 정확하게 구분해서 영상을 만들어줍니다.
STEP 9. 이미지 2장 모두 선택하기
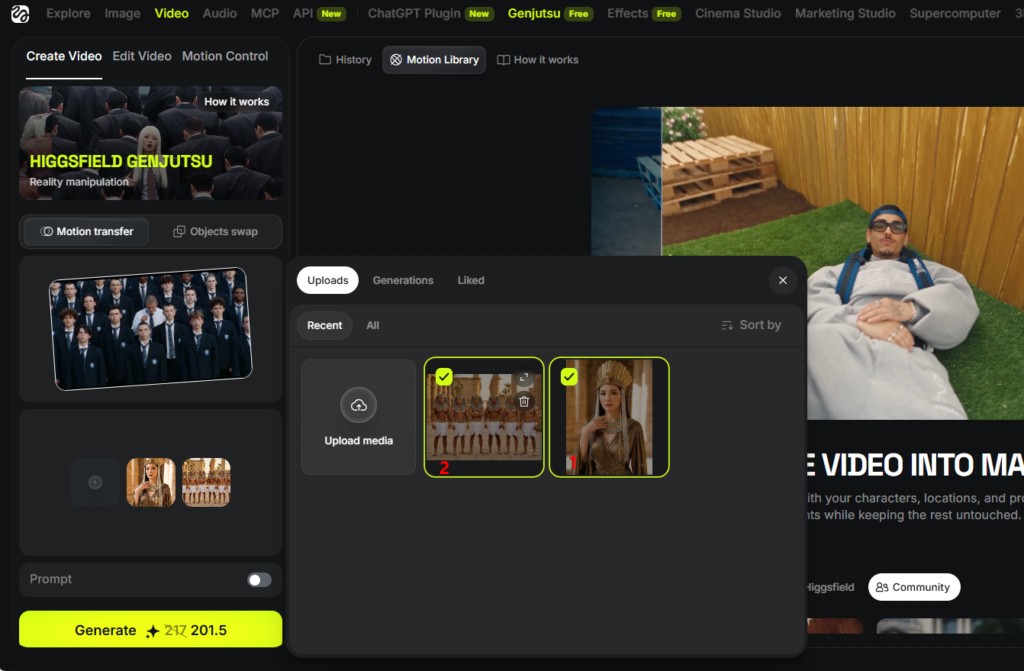
[두 이미지에 초록색 체크 표시된 화면]
업로드된 두 이미지를 각각 클릭해 체크 표시를 해주면, 왼쪽 패널에 Image 1(상반신 캐릭터), Image 2(백댄서 그룹)로 순서대로 등록됩니다.
STEP 10~11. 프롬프트 작성 및 영상 생성
STEP 10. 프롬프트로 역할 지정하기
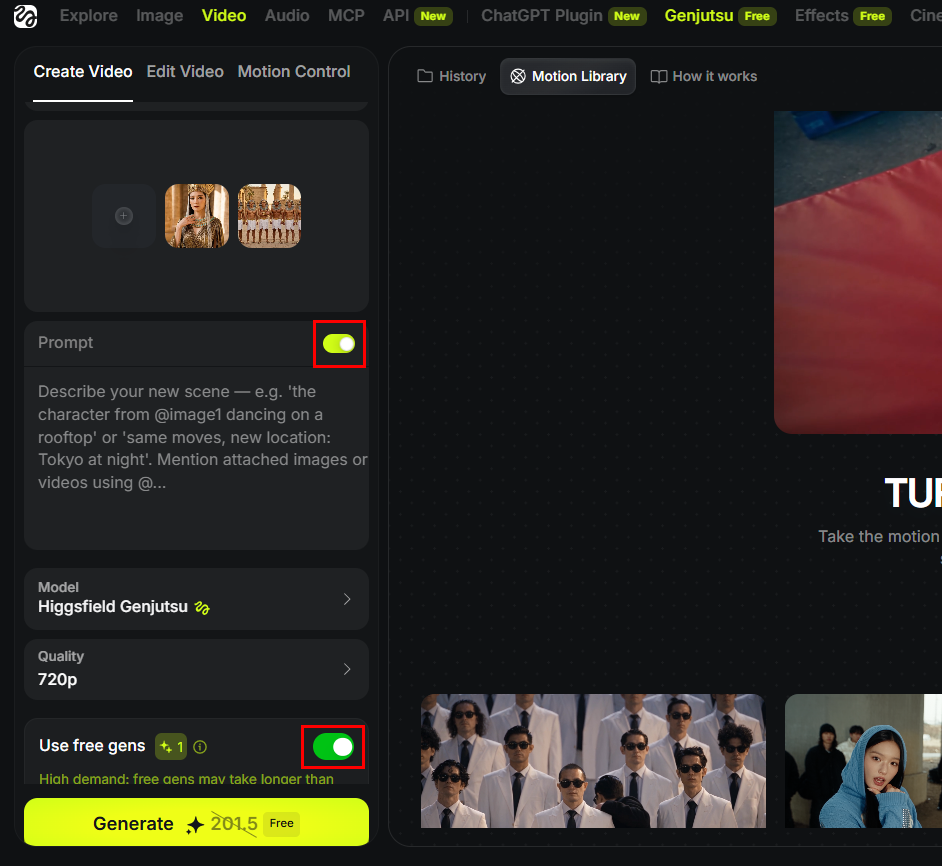
[Prompt 토글 ON, @Video1 / @Image1 / @Image2 태그 목록]
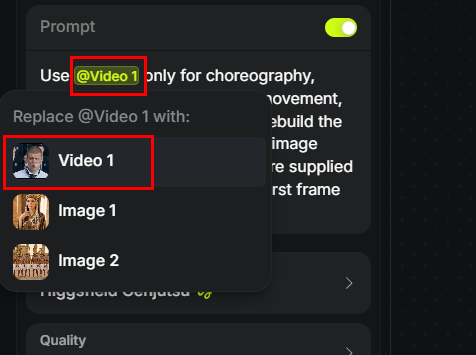
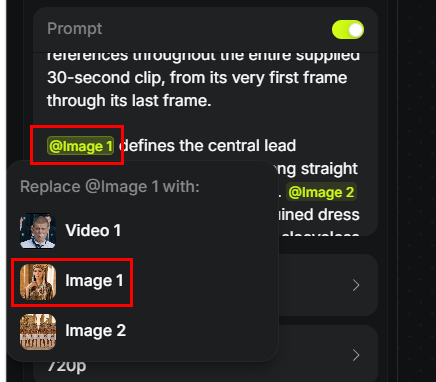
Prompt 토글을 켜면 텍스트로 세부 지시를 추가할 수 있습니다. 이때 핵심은 @ 멘션 기능이에요. 입력창에 @를 입력하면 Video 1, Image 1, Image 2를 바로 태그할 수 있는데, 이걸로 각 소스의 역할을 명확히 구분해줍니다.
아래는 이번 영상 제작에 실제로 사용한 프롬프트예요. 이 프롬프트를 그대로 복사해서 AI 입력창에 붙여넣은 다음, 본인이 만들고 싶은 컨셉 — 주인공의 모습, 옆에서 함께 춤추는 사람들의 모습, 배경(장소·조명 분위기) — 에 맞게 문장을 수정해서 사용하면 됩니다.
Use @Video1 only for choreography, performer positions, camera movement, source shot cuts and timing. Rebuild the complete visible cast from the image references throughout the entire supplied 30-second clip, from its very first frame through its last frame.
@Image1 defines the central lead woman’s recognizable face, long straight black hair, and natural makeup. @Image1 defines her metallic silver sequined dress with a deep plunging neckline, sleeveless fitted silhouette, and the surrounding ensemble’s individually distinct young adult male faces. @Image1 is also the single visual reference for the scene’s nightclub stage lighting — colorful blue, purple, and magenta spotlights cutting through haze, dark reflective stage floor, moody dramatic contrast. Maintain this same cast and photographic look for the whole clip; the changing camera distance must not change their identities or redesign the setting.
@Image2 is ONLY a construction reference for the ensemble’s full stage-suit costumes, not a face, lighting, pose, background, or ensemble-size reference. Every surrounding man wears black sunglasses, a fitted long-sleeve blazer with a notched lapel covered in a shiny blue holographic mosaic-tile pattern, matching mosaic-pattern straight-leg trousers in the same reflective blue tone, and no visible jewelry beyond the sunglasses. Every face remains naturally uncovered beneath the sunglasses.
Keep the complete costumes during every bow, head tilt, turn, dance movement, occlusion and reappearance. Each blazer stays buttoned or open as initially framed, the mosaic fabric pattern stays continuous and reflective through movement, and the sunglasses never fall off or shift out of place.
Map one stable individual man to every surrounding performer position, preserving the video’s performer count and formation. Initially they stand upright with arms at their sides; start moving only when the source choreography starts. The lead’s identity and silver sequined dress belong exclusively to the central performer. Do not inherit the source people’s faces, uniforms, ties, badges or hair.
Follow all of the supplied movement and camera progression continuously, including the lead turning and walking through the formation and the ensemble choreography, but omit the opening cigarette action entirely — the clip begins directly with the lead already standing in position on the nightclub stage, moving straight into the first choreographed beat with no smoking, no smoke, and no downward gaze associated with that action. No frozen tableaux, no omitted movement beyond the removed opening action, no added introduction, no added cuts, no appearance reset and no restoration of source identities at any time.
이 프롬프트 구조를 보면 역할이 아주 명확하게 나뉘어 있는 걸 알 수 있어요.
@Video1→ 안무, 동선, 카메라 워크, 컷 타이밍만 가져오는 용도@Image1→ 주인공(메인 캐릭터)의 얼굴·헤어·의상·배경 조명 컨셉을 정의하는 용도@Image2→ 주인공 옆에서 함께 춤추는 사람들의 의상(코스튬) 컨셉만 정의하는 용도
본인의 컨셉에 맞게 수정할 때도 이 세 가지 역할 구분(모션 / 주인공 / 백댄서)만 유지한 채로 인물의 외형, 의상 디테일, 배경 묘사만 바꿔주면 원하는 결과물을 얻기 훨씬 쉬워집니다.
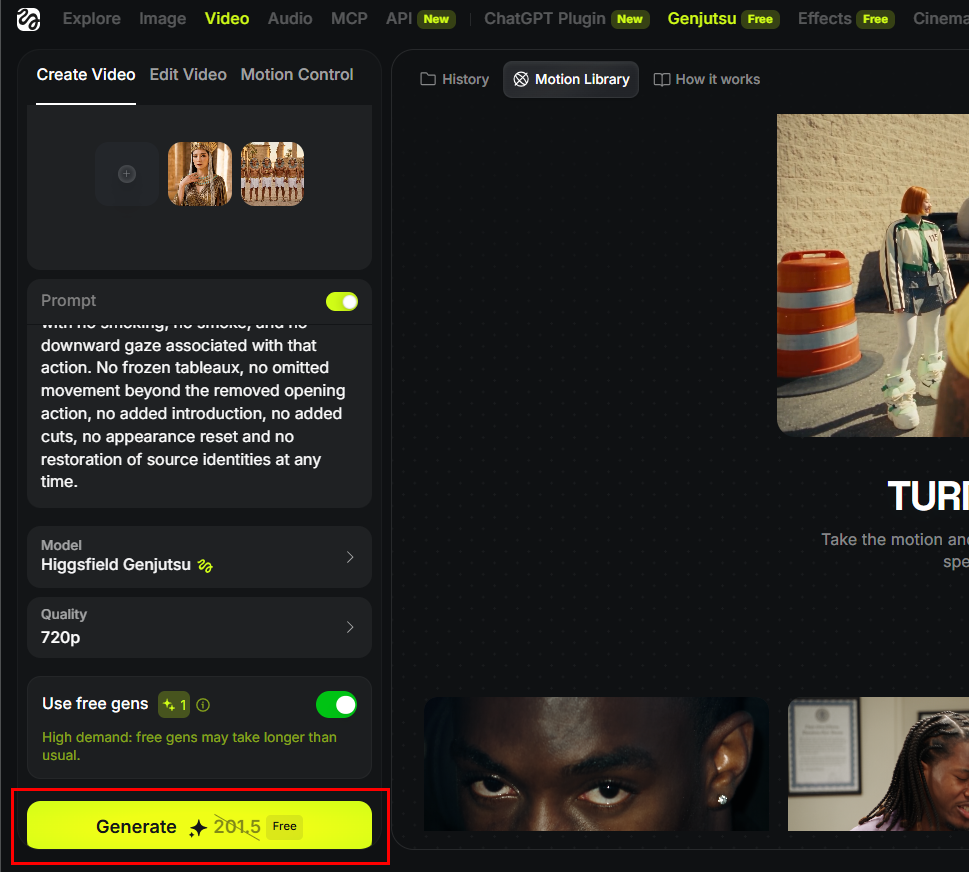
STEP 11. 옵션 확인 후 생성하기
[Model: Higgsfield Genjutsu / Quality 720p / Generate 버튼]
마지막으로 하단의 Model이 Higgsfield Genjutsu로, Quality가 원하는 해상도(예: 720p)로 설정되어 있는지 확인합니다. 무료 생성 크레딧(Use free gens)을 사용할지 여부도 이 단계에서 선택할 수 있어요. 모든 설정이 끝났다면 Generate 버튼을 눌러 영상 생성을 시작합니다!
마무리
생성이 완료되면 원본 영상의 안무 그대로, 내가 지정한 캐릭터가 춤추는 완전히 새로운 ‘스톰 챌린지’ 영상이 나옵니다. 춤 연습 없이도 트렌드 챌린지에 참여할 수 있는 아주 좋은 방법이죠.
아직 힉스필드 계정이 없다면 아래 링크로 들어가서 가입하고 시작해보세요.


